How to Weave in Ends So They Stay Put (and Stay Hidden)
Weaving in ends is the part of crochet nobody gets excited about. But a few minutes of careful finishing is the difference between a blanket that lasts for years and one with little tails poking out after the first wash. Here's how to do it so they stay put.
 Save
What You'll Learn
- The simple rule that keeps ends from slipping out
- How to weave ends on rows, rounds and color changes
- How to hide ends inside amigurumi
- How long to leave your tails, and when to trim
What you’ll need
- A yarn needle (also called a tapestry needle): blunt tip, big eye
- Small, sharp scissors
The one rule that makes ends stay put
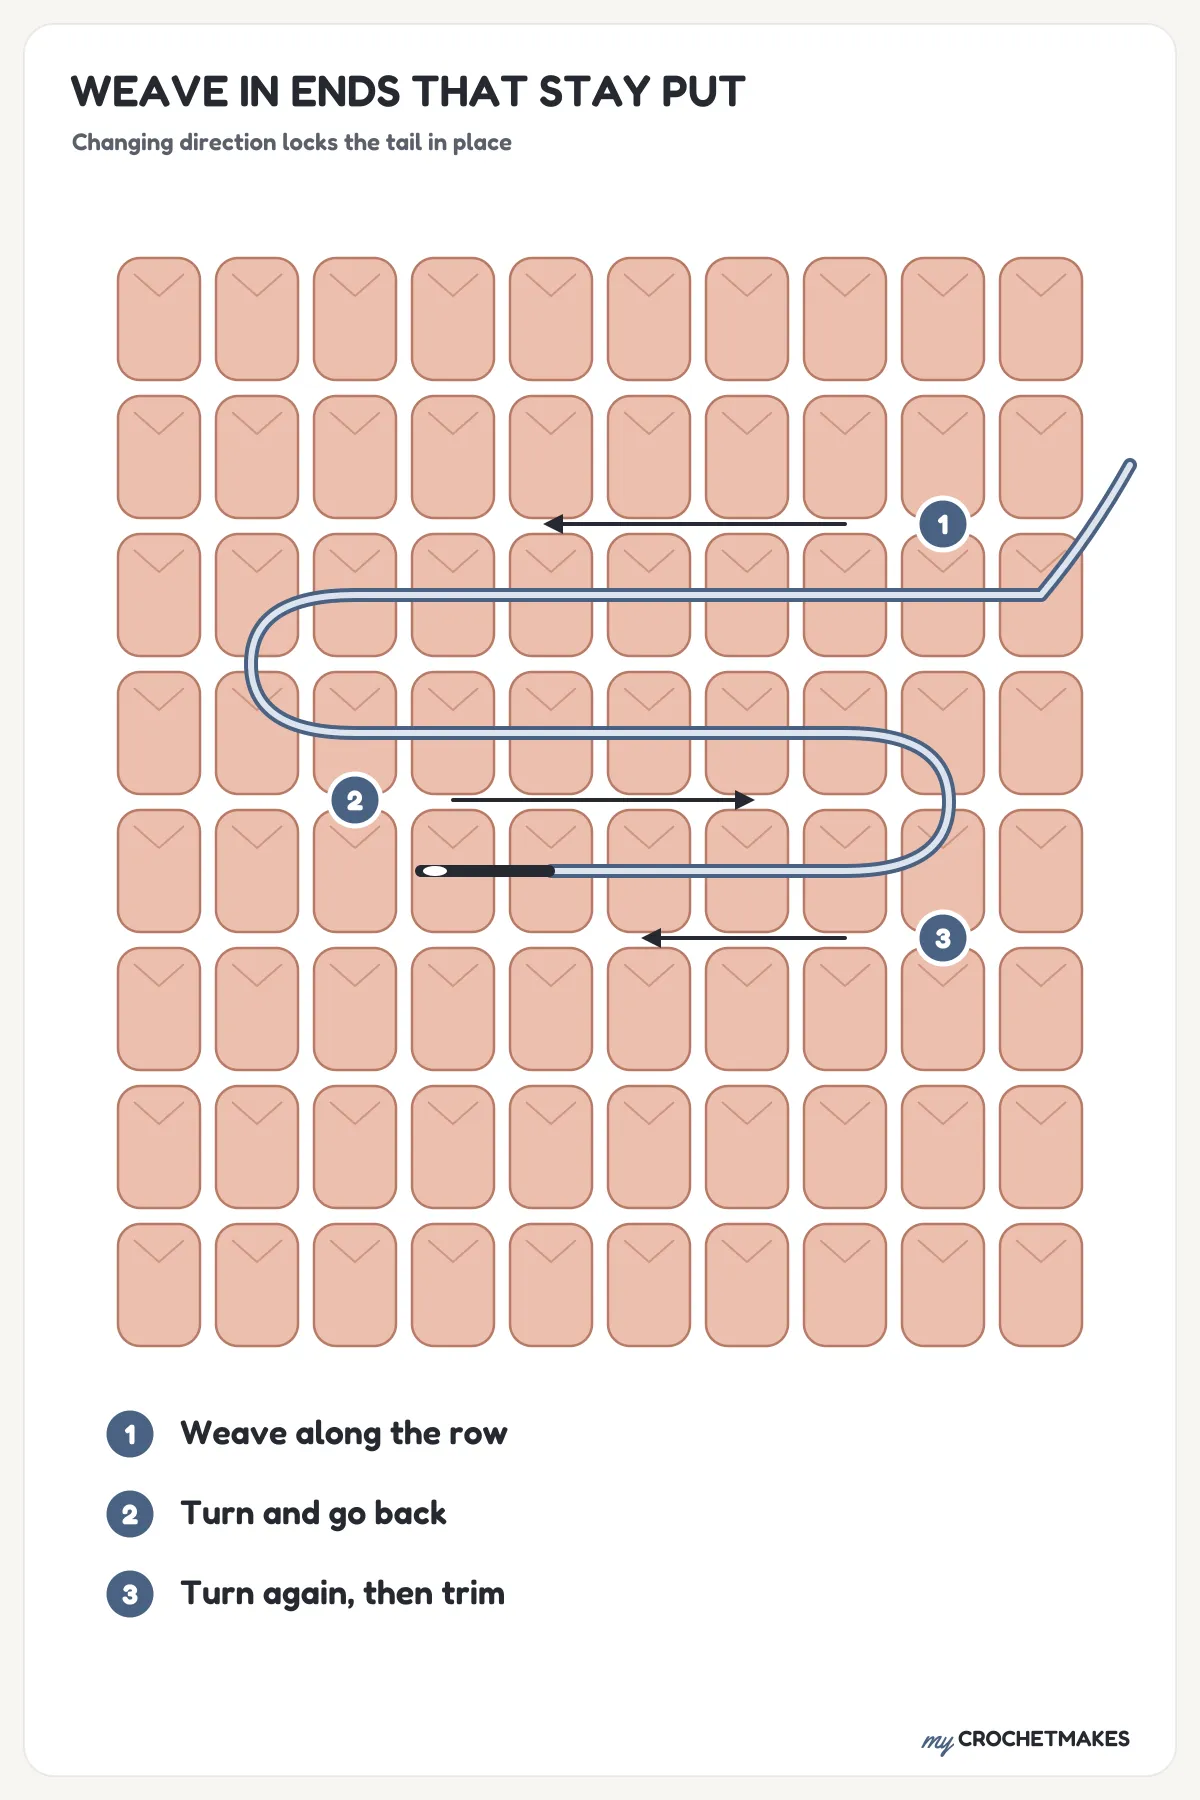
Change direction. An end woven in a straight line can slide right back out. An end that goes one way, then turns back the other way, then turns again, gets locked in by its own bends.
Aim for at least two changes of direction for every end.
How to weave in ends on rows
This works for anything made in rows, like scarves, dishcloths and blankets.
- Thread the tail onto your yarn needle.
- Work on the wrong side of your piece, if it has one.
- Weave along the row for about 1 inch (2.5 cm), passing the needle through the backs or posts of the stitches. Stay inside the stitches rather than skimming across the surface.
- Turn and go back the other way, through the stitches next to the ones you just used.
- Turn once more and weave a short way.
- Gently stretch the fabric in all directions so the tail settles in.
- Trim the tail close, but not right against the fabric.
How to weave in ends on rounds
For hats, coasters and anything worked in the round, weave along the round (side to side) instead of up and down. It keeps the end hidden in the stitch pattern.
If you started with a magic ring, weave its tail through the first round in a couple of directions, crossing over the center to close any tiny gap.
How to weave in ends at a color change
When you change colors, weave each tail into its own color:
- The blue tail goes into the blue stitches.
- The white tail goes into the white stitches.
That way, no little dots of the wrong color peek through on the front.
How to hide ends in amigurumi
For stuffed toys, there’s an even easier trick:
- Thread the tail onto your needle.
- Push the needle into the toy and out the other side.
- Pull the yarn snug, so it disappears inside.
- Go back in close to where you came out, and out somewhere else.
- Gently squeeze the toy, then trim the tail close to the surface. The end slips back inside, out of sight.
Tips for tidy finishing
- Leave about 6 inches (15 cm) of tail when you start and finish. Short tails are hard to weave.
- Weave as you go. Weaving in a few ends after each section feels much less daunting than facing fifty at the end. This is especially true for granny square blankets!
- Don’t pull too tight. That puckers the fabric. You want the end snug, not strangling the stitches.
- Stretch before you trim. Once the end settles, trim it. The fabric relaxes and the tip tucks itself away.
Finishing well
Weaving in ends isn’t the fun part, but it’s what makes a handmade gift look and feel lovely for years. It’s worth the extra few minutes. Put on a cup of tea, find a cozy spot, and get them done. 🧶
Frequently asked questions
How long should I leave my yarn tail for weaving in?
About 6 inches (15 cm). That gives you enough to thread a needle and weave in a few directions.
Do I need a special needle?
A yarn needle (also called a tapestry needle) works best. It has a blunt tip and a big eye, so it slides between stitches without splitting the yarn.
Can I just tie a knot instead?
Knots can work loose and leave hard little lumps. Weaving the tail in through your stitches is much more secure and invisible.
Why do my ends keep popping out after washing?
Usually they were woven in only one direction, or trimmed too short. Change direction at least twice and leave a little tail before trimming.