Free Driftwood Ribbed Crochet Pouf Pattern
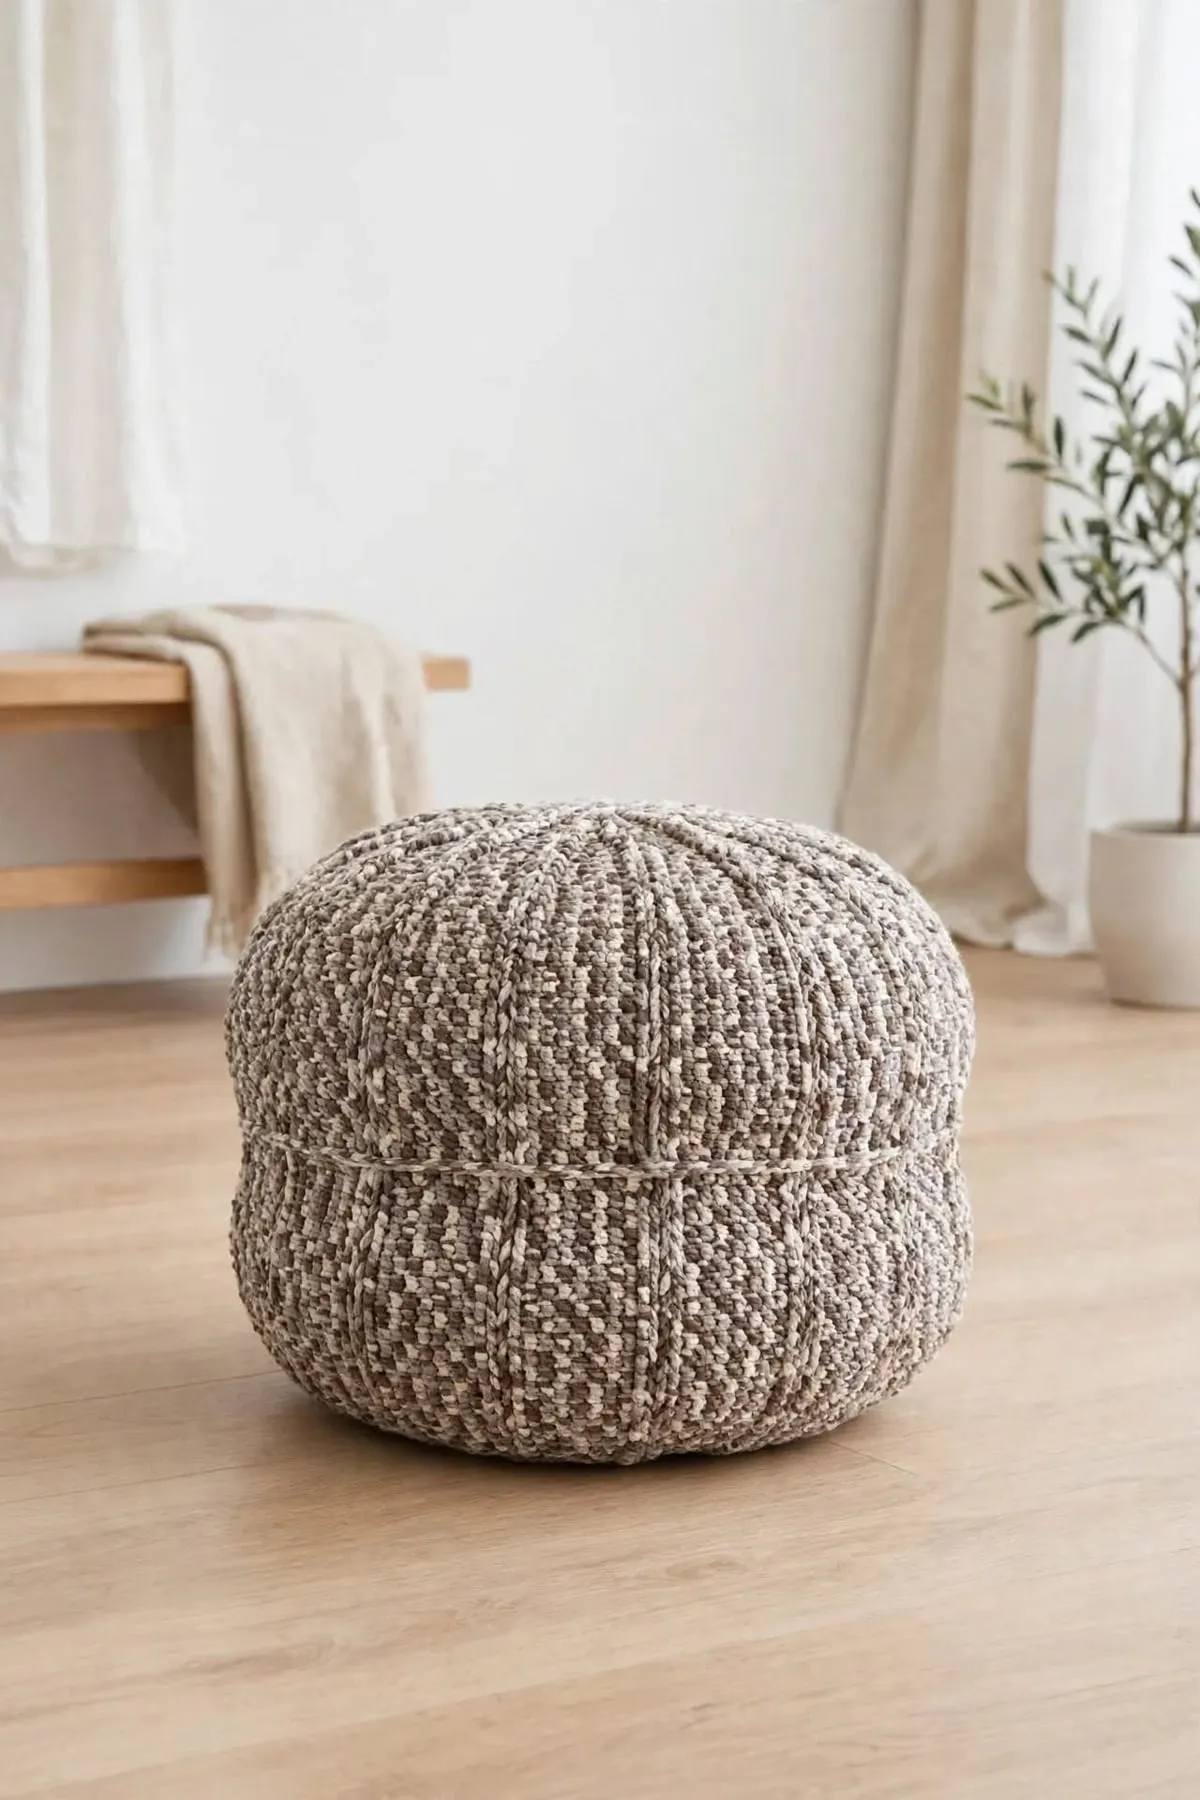
This cozy floor pouf has raised ribs that fan out from the center like the spokes of a wheel. It's made in two matching halves of bulky yarn, each a flat top with straight sides, then joined around the middle and stuffed.
 Save
Pattern Highlights
- The raised spokes come from just one special stitch, the front post double crochet.
- Both halves are the same, so once you've made one you know the whole pattern.
- Speckled yarn hides any wobbly stitches and looks lovely in any room.
- Every round has a stitch count, so you can check as you go.
Materials
- About 900 yd (823 m) bulky (#5) yarn
- 6 mm (J-10) crochet hook
- Stuffing: an old duvet cover filled with fiberfill or spare fabric, or a round pouf insert about 20 in (50 cm) across
- Yarn needle
- Stitch marker (optional)
Abbreviations used
This pattern uses US crochet terms. Tap any abbreviation for a full explanation, or see the complete crochet abbreviations list.
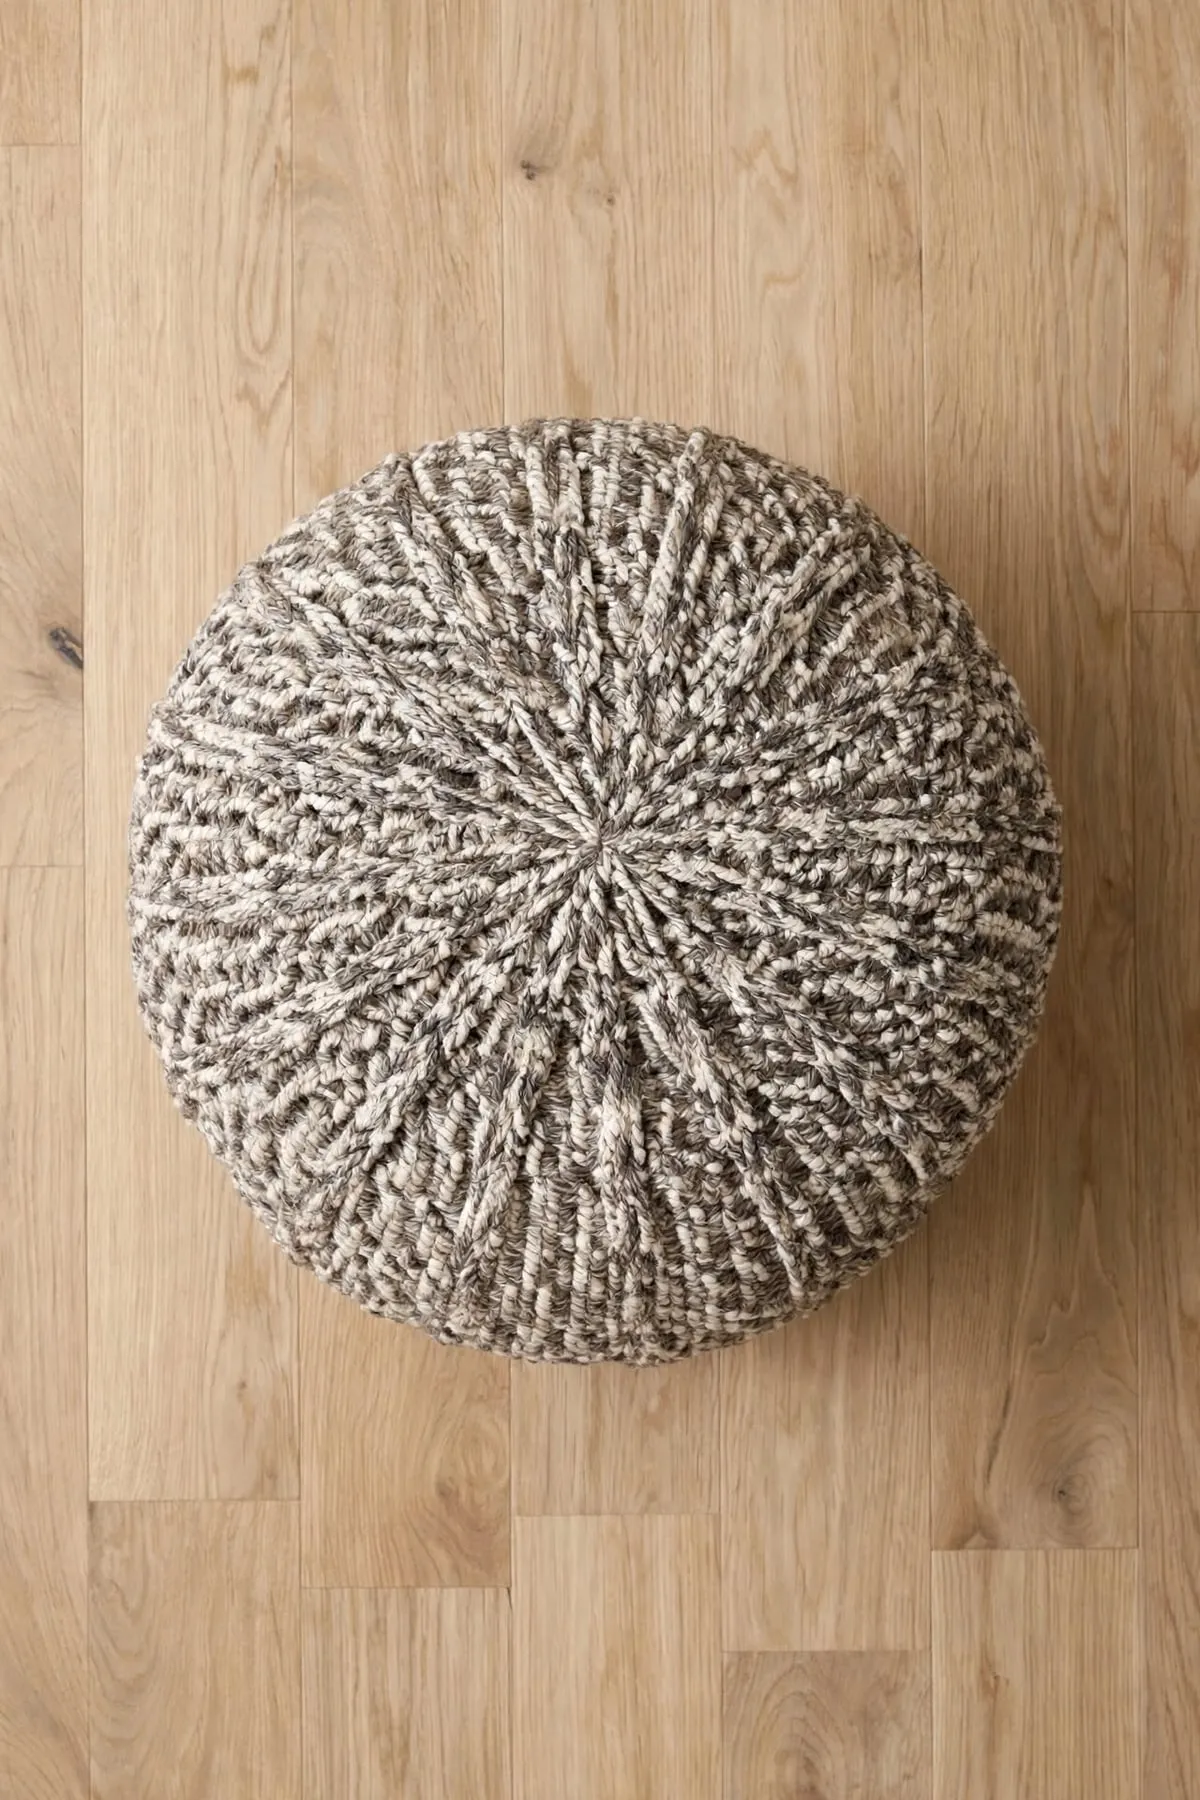
About this pouf
This floor pouf is made in two matching halves. Each half starts with a flat circle worked from the center out, with 12 raised spokes of front post double crochet and plain double crochet in between. After the top is big enough, you stop increasing and keep working rounds, so the fabric turns down and makes the sides. Then you join the two halves around the middle and stuff the pouf as you close it.
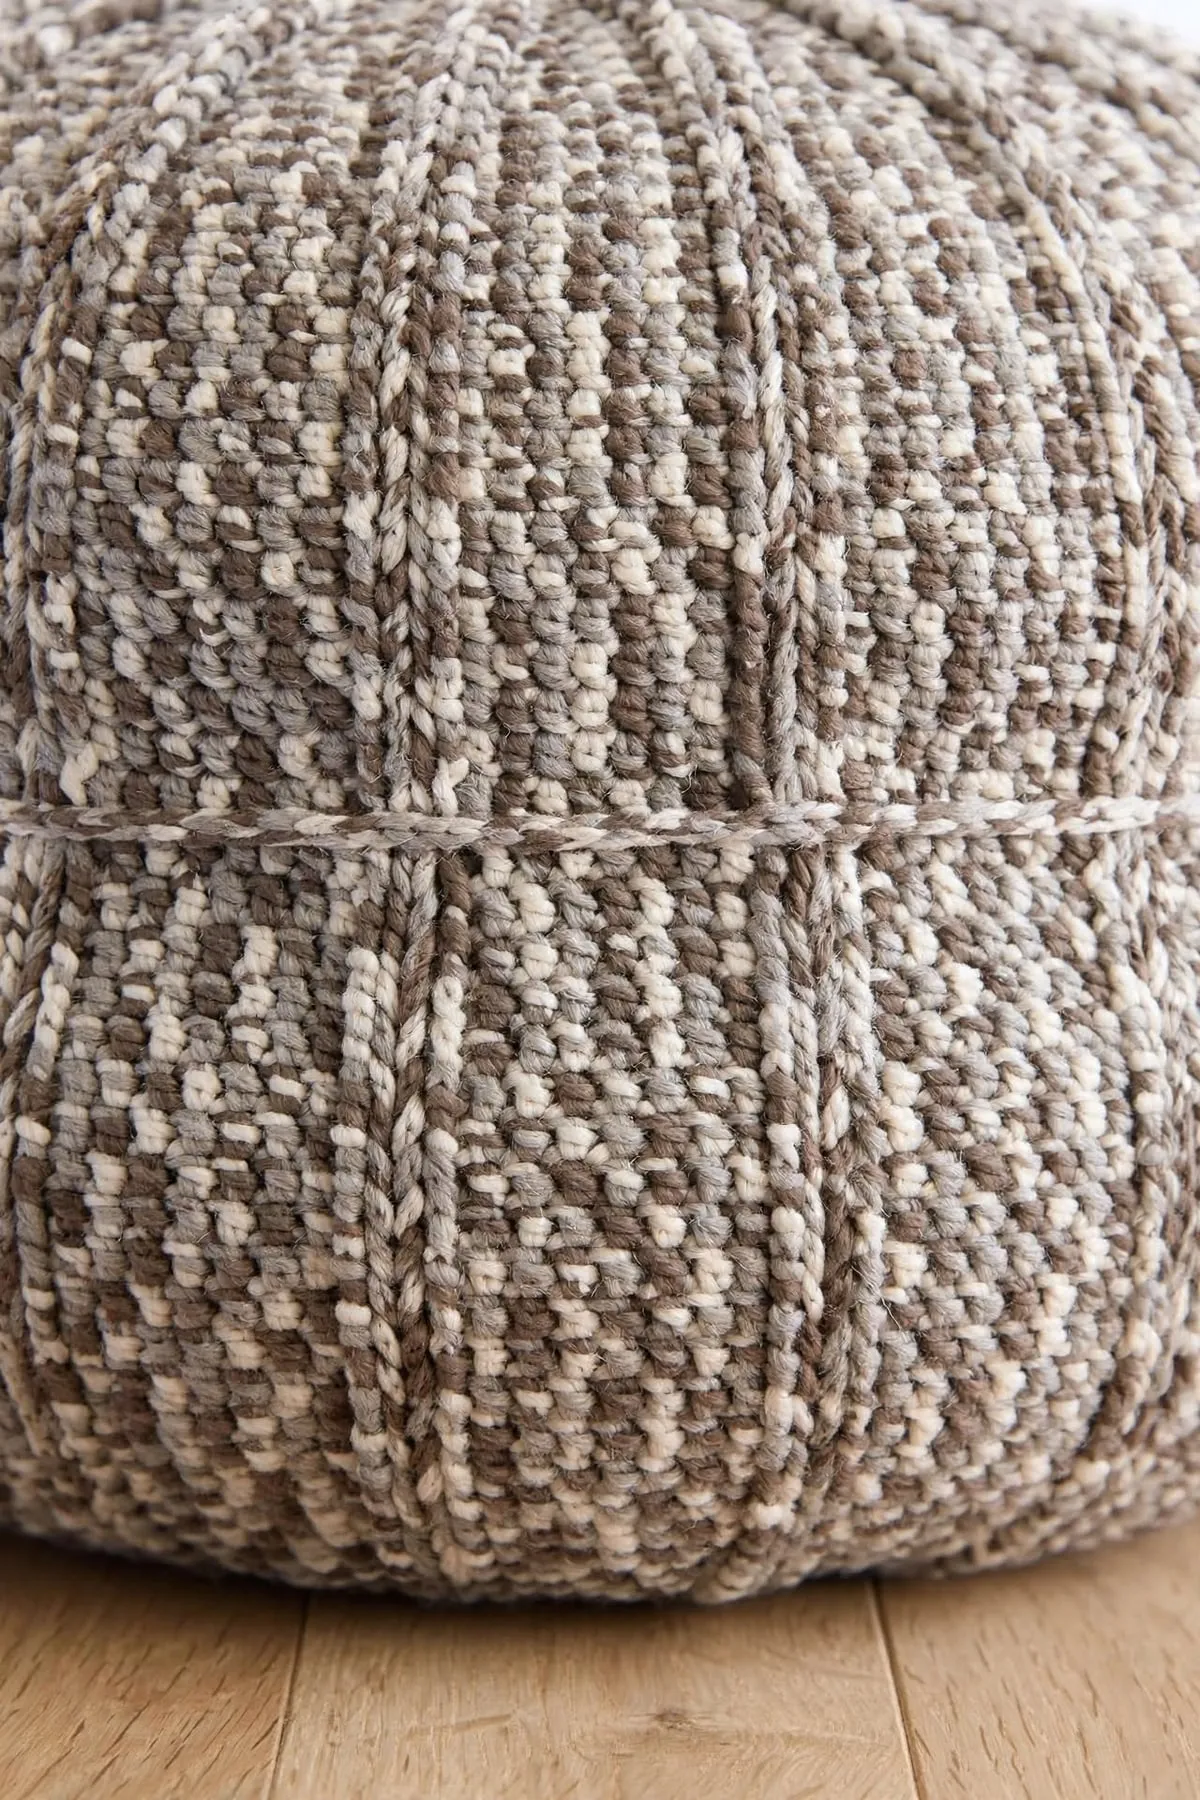
A bulky speckled yarn in gray, brown and cream gives it that soft driftwood look.
Before you start
This one is rated intermediate. The stitches are simple, but you’ll need to work front post stitches and keep careful count on a big piece.
- The rounds are joined. Each round ends with a sl st into the top of the first stitch.
- It starts with a magic ring. If you’re new to it, my magic ring tutorial walks you through it step by step.
- Count your stitches. Every round on the top has 12 more stitches than the one before, up to 168.
How the spokes work
Each spoke is a front post double crochet worked around the spoke from the round below. So the spokes stack on top of each other and make long, raised ribs from the center out to the edge.
Between the spokes are panels of plain double crochet. Each round on the top, every panel gets 1 more stitch. On odd rounds the extra stitch goes at the start of the panel and on even rounds at the end, so the top stays nice and round.
Tips for success
- Lay it flat often. Check your top every few rounds. If it cups or ruffles, count the round and look at your hook size.
- Don’t pull the posts tight. Loose, even front post stitches make neat ribs and keep the top flat.
- Line up the spokes. When you join, match the spokes on both halves so they run straight down the sides.
- Stuff it firmly. A firm pouf keeps its shape when you sit on it or rest your feet on it.
Skills you’ll use
- How to crochet a magic ring, to start each half
- How to double crochet, for the panels and the front post spokes
- How to single crochet, for the joining round
- How to weave in ends, to finish neatly
A big, squishy pouf is perfect as a footrest, an extra seat or a cozy spot in a reading nook. 🪵
The Pattern
- Skill level
- Intermediate
- Yarn
- Bulky (#5) yarn
- Yarn amount
- About 900 yd (823 m) of bulky yarn. A speckled or variegated gray, brown and cream looks like the photos. This is an estimate, so buy a little extra.
- Hook
- 6 mm (US J-10)
- Gauge
- 12 dc and 6 rnds = 4 in (10 cm). The top should measure about 18 in (46 cm) across after Rnd 14.
- Finished size
- About 19 in (48 cm) across and 14 in (36 cm) tall when stuffed
- Time
- Varies with experience
Pouf halves (make 2)
- With bulky yarn, make a magic ring.
- Rnd 1: Ch 2 (doesn't count as a st here or on any round), work 12 dc into the ring. Join with a sl st to the top of the first dc. Pull the ring closed. (12 dc)
- Rnd 2: Ch 2. [FPdc around the next dc, 1 dc in the top of that same dc] 12 times. Join with a sl st to the top of the first FPdc. (24 sts: 12 FPdc and 12 dc)
- Rnd 3: Ch 2. [FPdc around the next FPdc, 2 dc in the next dc] 12 times. Join with a sl st to the top of the first FPdc. (36 sts: 12 FPdc and 24 dc)
- Rnd 4: Ch 2. [FPdc around the next FPdc, 1 dc in the next dc, 2 dc in the next dc] 12 times. Join with a sl st to the top of the first FPdc. (48 sts: 12 FPdc and 36 dc)
- Rnd 5: Ch 2. [FPdc around the next FPdc, 2 dc in the next dc, 1 dc in each of the next 2 dc] 12 times. Join with a sl st to the top of the first FPdc. (60 sts: 12 FPdc and 48 dc)
- Rnd 6: Ch 2. [FPdc around the next FPdc, 1 dc in each of the next 3 dc, 2 dc in the next dc] 12 times. Join with a sl st to the top of the first FPdc. (72 sts: 12 FPdc and 60 dc)
- Rnd 7: Ch 2. [FPdc around the next FPdc, 2 dc in the next dc, 1 dc in each of the next 4 dc] 12 times. Join with a sl st to the top of the first FPdc. (84 sts: 12 FPdc and 72 dc)
- Rnd 8: Ch 2. [FPdc around the next FPdc, 1 dc in each of the next 5 dc, 2 dc in the next dc] 12 times. Join with a sl st to the top of the first FPdc. (96 sts: 12 FPdc and 84 dc)
- Rnd 9: Ch 2. [FPdc around the next FPdc, 2 dc in the next dc, 1 dc in each of the next 6 dc] 12 times. Join with a sl st to the top of the first FPdc. (108 sts: 12 FPdc and 96 dc)
- Rnd 10: Ch 2. [FPdc around the next FPdc, 1 dc in each of the next 7 dc, 2 dc in the next dc] 12 times. Join with a sl st to the top of the first FPdc. (120 sts: 12 FPdc and 108 dc)
- Rnd 11: Ch 2. [FPdc around the next FPdc, 2 dc in the next dc, 1 dc in each of the next 8 dc] 12 times. Join with a sl st to the top of the first FPdc. (132 sts: 12 FPdc and 120 dc)
- Rnd 12: Ch 2. [FPdc around the next FPdc, 1 dc in each of the next 9 dc, 2 dc in the next dc] 12 times. Join with a sl st to the top of the first FPdc. (144 sts: 12 FPdc and 132 dc)
- Rnd 13: Ch 2. [FPdc around the next FPdc, 2 dc in the next dc, 1 dc in each of the next 10 dc] 12 times. Join with a sl st to the top of the first FPdc. (156 sts: 12 FPdc and 144 dc)
- Rnd 14: Ch 2. [FPdc around the next FPdc, 1 dc in each of the next 11 dc, 2 dc in the next dc] 12 times. Join with a sl st to the top of the first FPdc. (168 sts: 12 FPdc and 156 dc)
- Rnds 15–24: Ch 2. [FPdc around the next FPdc, 1 dc in each of the next 13 dc] 12 times. Join with a sl st to the top of the first FPdc. (168 sts: 12 FPdc and 156 dc)
- Fasten off the first half. Make a second half the same way, but don't fasten off: you'll use its working yarn to join.
Joining
- Hold the two halves together, wrong sides facing each other, with the spokes lined up.
- Working through both halves at once, ch 1, then work 1 sc in each st all the way around. (168 sc)
- When you're about three quarters of the way around, push the stuffing in between the halves, filling it firmly. Finish the round, join with a sl st to the first sc and fasten off. Weave in all ends.
Pattern notes
- FPdc (front post double crochet): yarn over, insert your hook from front to back to front around the post of the stitch, yarn over and pull up a loop, then [yarn over and pull through 2 loops] twice.
- The ch 2 at the start of each round doesn't count as a stitch. Each round is joined with a sl st to the top of the first stitch.
- After the join, the first FPdc of the next round goes around the post of the FPdc you just joined into.
- Rnds 1–14 make the flat top. Rnds 15–24 have no increases, so the fabric turns down to make the sides.
Keep this pattern handy
Print it now, or get the free PDF to save on your phone or tablet.
Free Driftwood Ribbed Crochet Pouf Pattern · Pattern by mycrochetmakes · mycrochetmakes.com/ribbed-crochet-pouf-pattern/
Free for personal use. Please don't sell or redistribute this pattern.
Frequently asked questions
What's a front post double crochet?
Instead of working into the top of a stitch, you work around its post (the tall part), inserting your hook from the front. It pushes the stitch forward and makes a raised rib.
How do I stuff the pouf?
The easiest way is to fill an old duvet cover or pillowcase with fiberfill, old towels or spare fabric and slide it in before you finish the seam. You can also buy a ready-made round pouf insert about 20 in (50 cm) across.
My top is ruffling. What's wrong?
Usually your stitches are a little short. Try a hook half a size bigger, or check you're adding just 12 stitches each round.
My top is cupping before Rnd 14. How do I fix it?
Cupping means your stitches are tight or a round is missing increases. Count your round, and try a hook half a size bigger.
Can I make it bigger?
Yes. Keep increasing for a few more rounds (12 more stitches each time), then work a few extra rounds of the sides. You'll need more yarn and a bigger insert.