Free Pixie Baby Hoodie Crochet Pattern with a Kangaroo Pocket
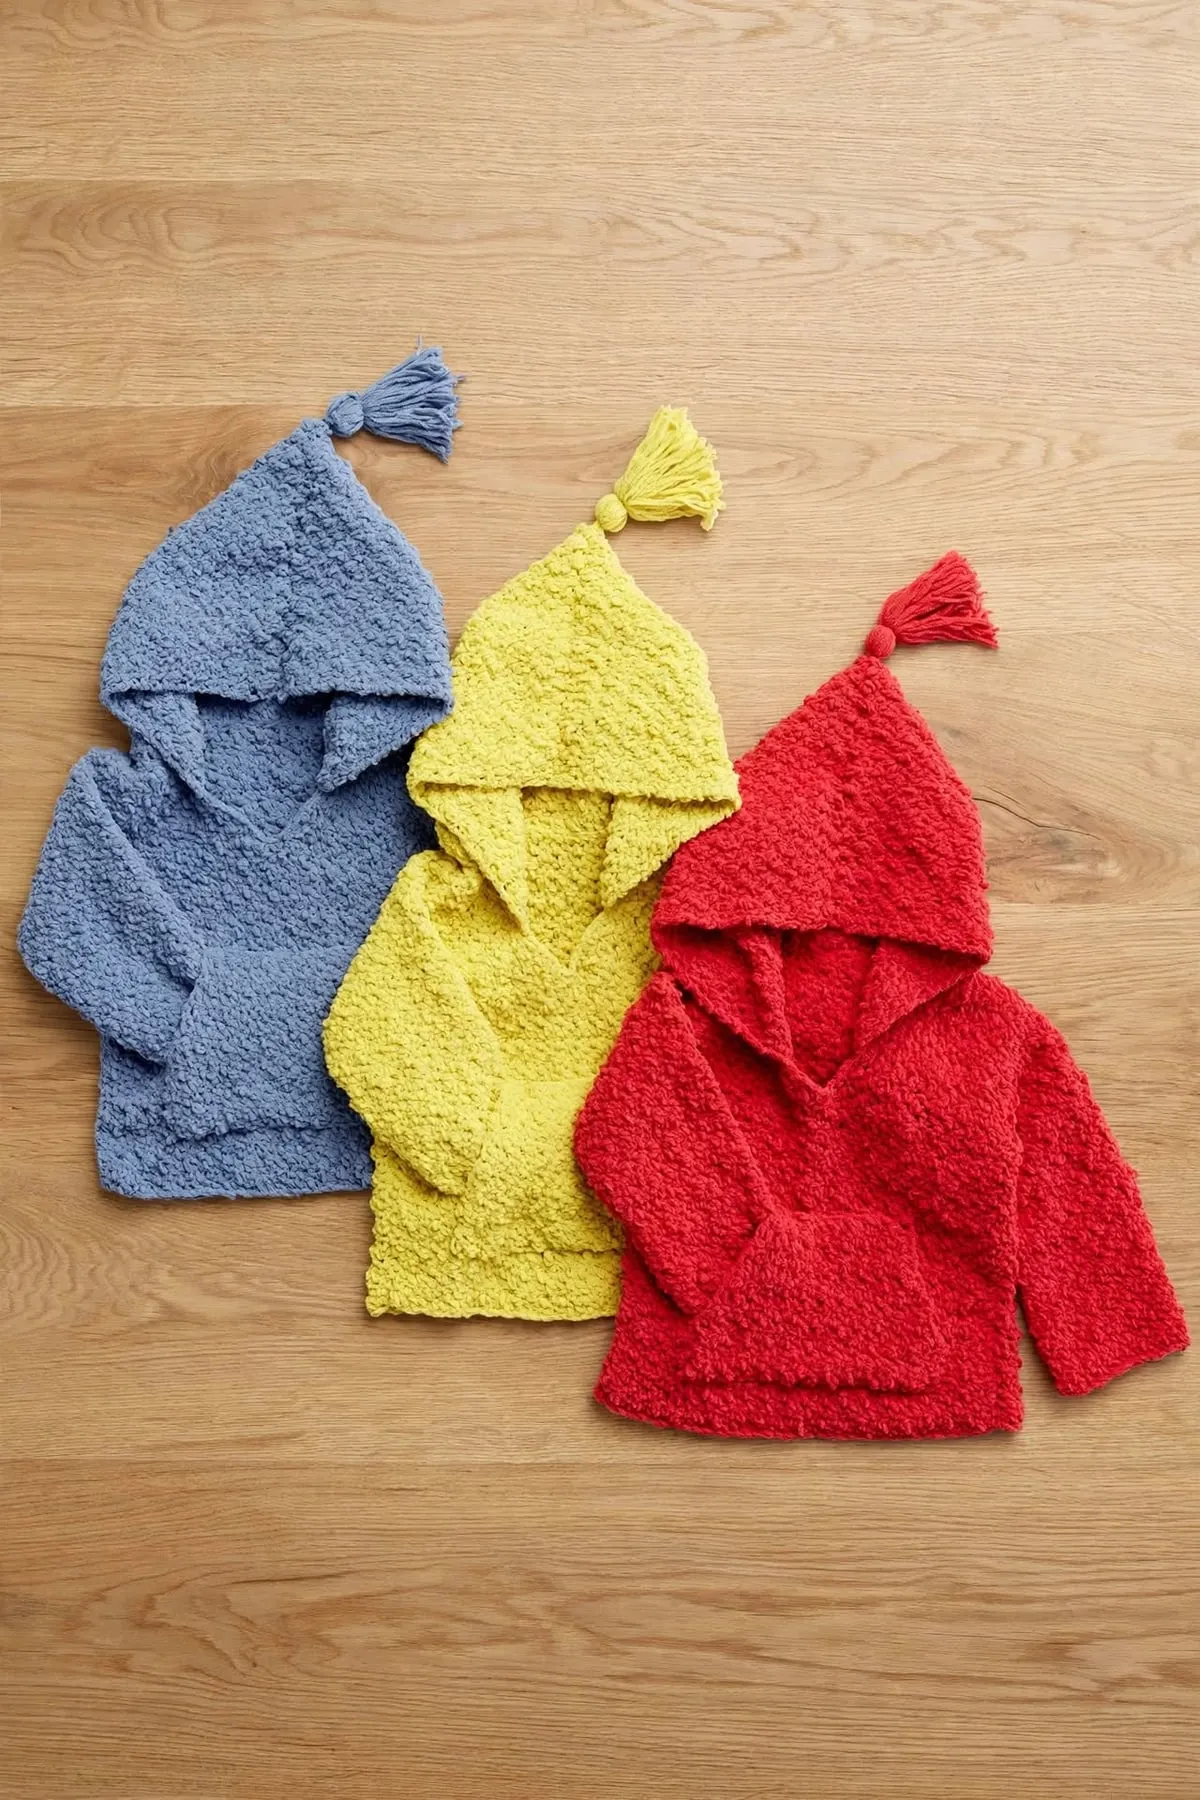
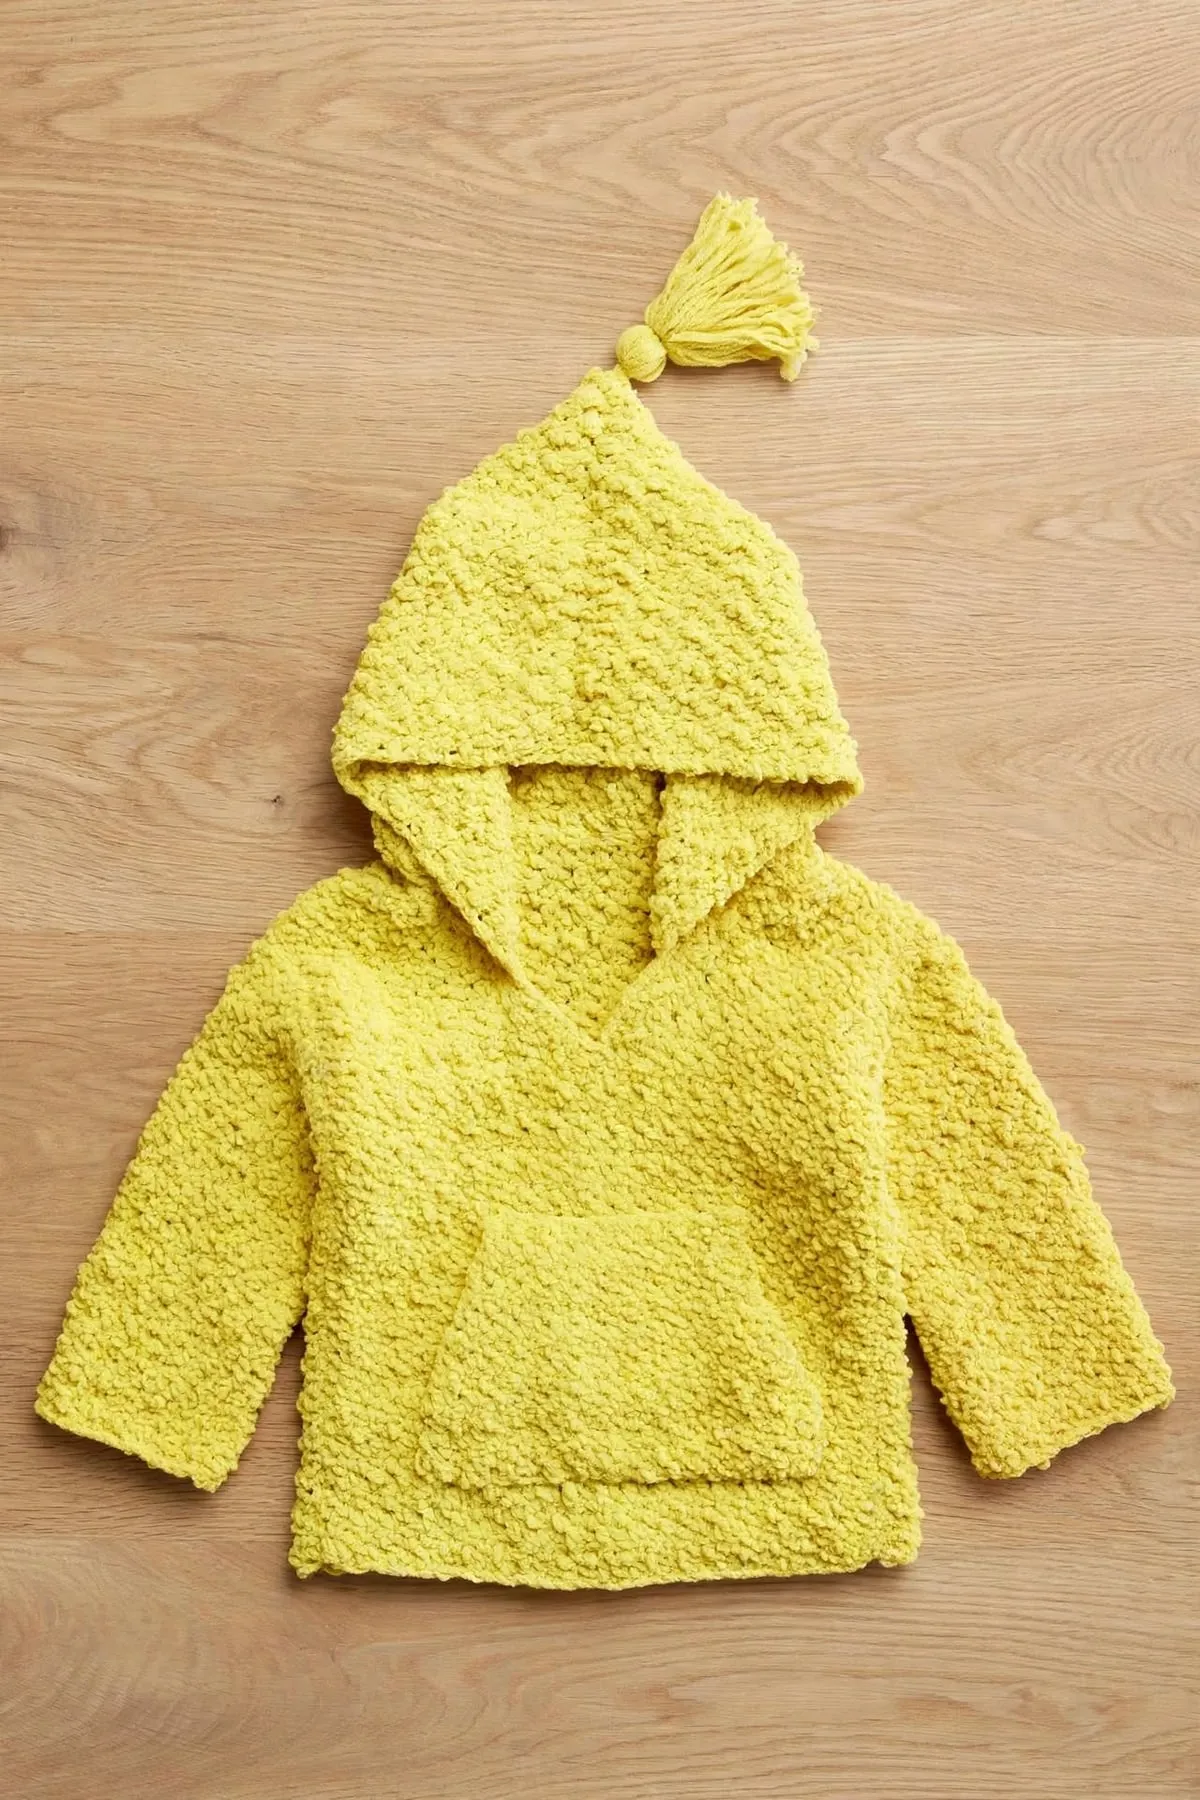
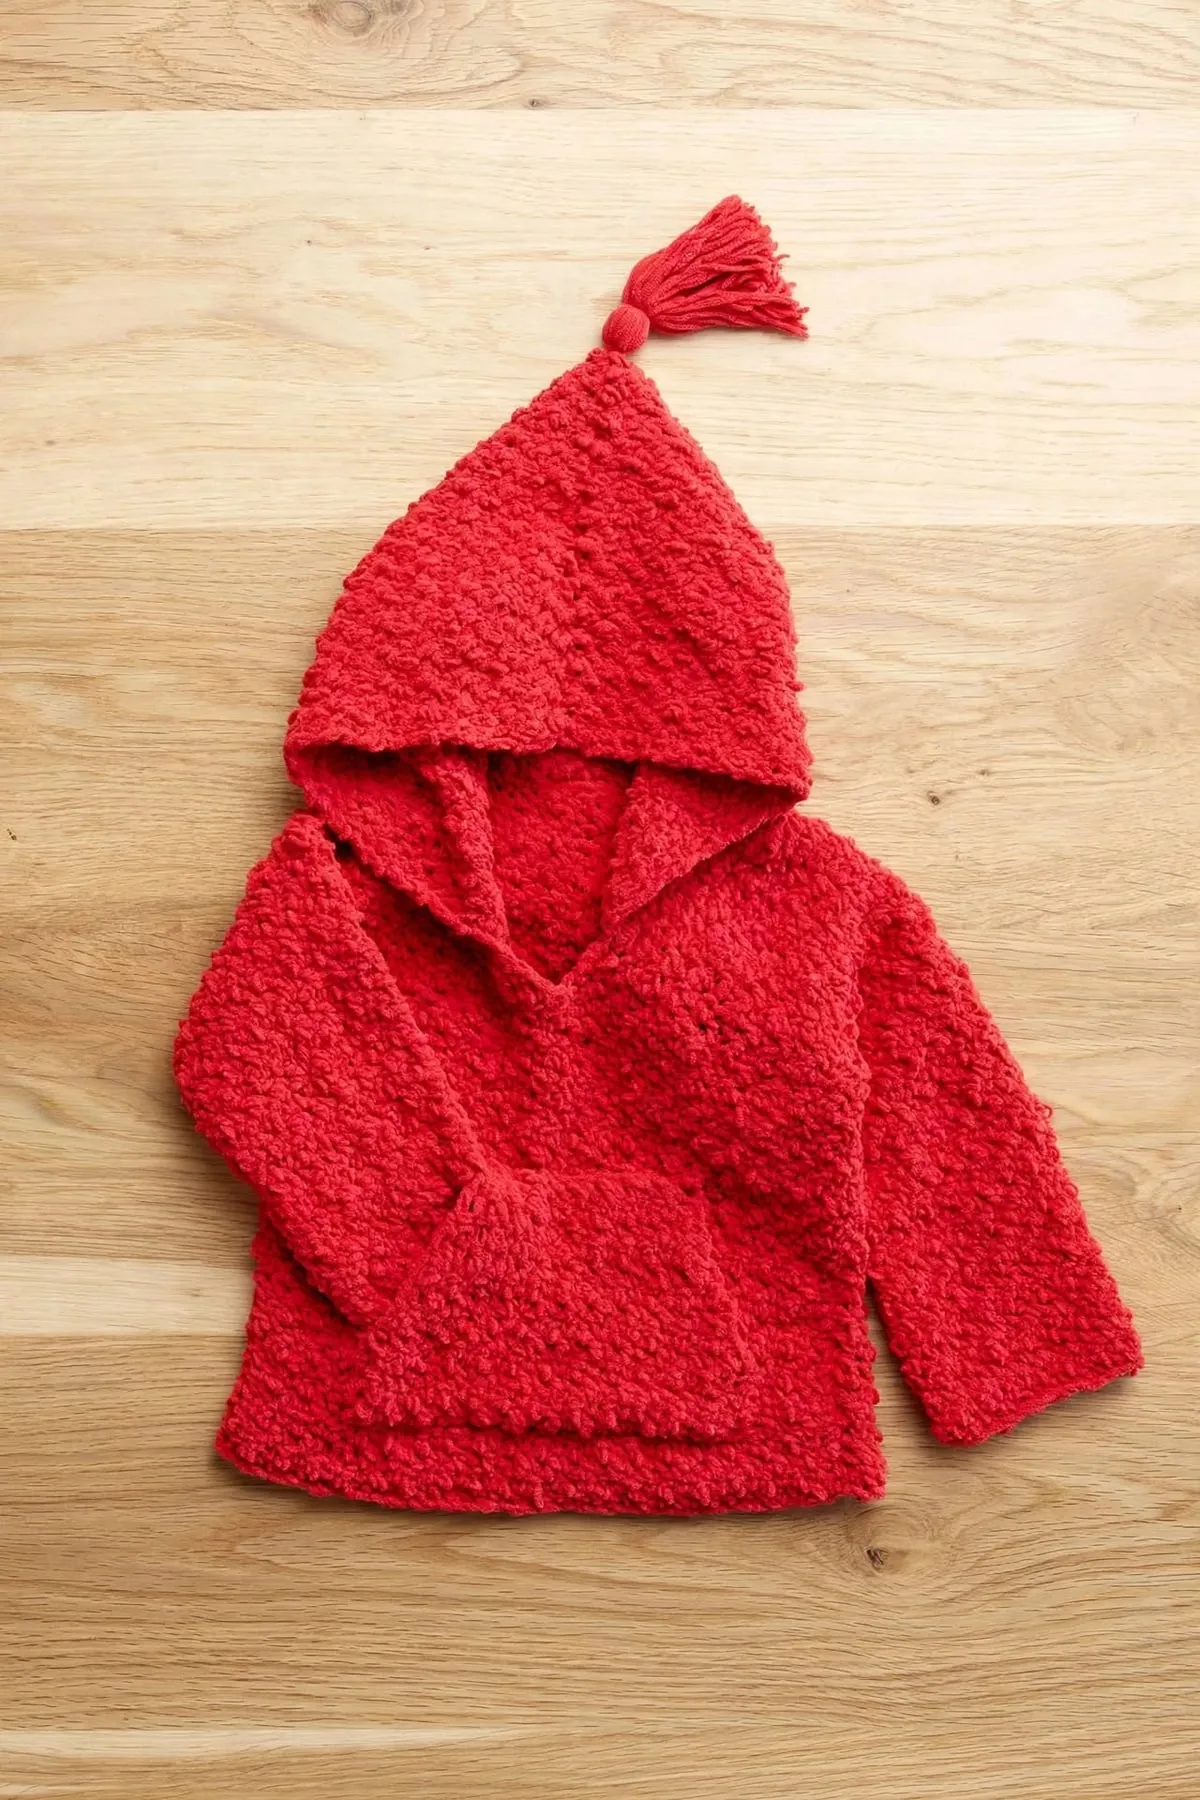
This snuggly baby hoodie has a pointy pixie hood with a tassel and a kangaroo pocket for little hands. It's made from simple rectangles in easy half double crochet, in a soft plush yarn, in sizes 6, 12 and 24 months.
 Save
Pattern Highlights
- Every piece is a simple rectangle, so it's a great first baby garment.
- Only one stitch, the half double crochet, for the whole thing.
- The pointy hood comes from just folding a rectangle in half.
- The slit neck makes it easy to pull over a baby's head.
Materials
- Bulky (#5) plush baby yarn, see the amount for your size
- 6 mm (J-10) crochet hook
- Stitch markers
- Yarn needle
- A piece of cardboard 3 in (7.5 cm) wide, for the tassel
Abbreviations used
This pattern uses US crochet terms. Tap any abbreviation for a full explanation, or see the complete crochet abbreviations list.
About this baby hoodie
This little hoodie is made from simple pieces: a Back, a Front with a slit for the neck, two Sleeves, a Hood and a kangaroo pocket. They’re all rectangles worked in rows of half double crochet, so there’s no tricky shaping. The shoulders are drop shoulders, and the hood is a rectangle folded in half and sewn across the top, which makes that sweet pointy pixie shape.
A soft plush baby yarn makes it extra cuddly, and a tassel on the point of the hood finishes it off.
Before you start
This one is rated easy. If you can chain and half double crochet in rows, you can make it.
- Pick your size. Sizes are written as 6 (12, 24) months. Highlight the numbers for your size before you start.
- Check your gauge. Make a small swatch first. If you have more than 11 hdc to 4 in, use a bigger hook; if you have fewer, use a smaller one.
- Count your rows. The Back and Front have the same number of rows, so the side seams match up.
How the hood gets its point
The hood starts as a flat rectangle. When you fold it in half and sew the top edge together, the folded corner at the back sticks up into a point, like a pixie or gnome hat. The two open side edges become the face opening, and the bottom edge is sewn around the neck.
Tips for success
- Use stitch markers. Plush yarn hides stitches, so a marker in the first and last stitch of each row helps a lot.
- Sew with a smooth yarn. If your plush yarn is hard to sew with, use a smooth yarn in the same color for the seams.
- Keep the neck roomy. The slit and the open stitches at the top make it easy to pull over a baby’s head.
- Sew the tassel firmly. Stitch through it several times so little hands can’t pull it off.
Skills you’ll use
- How to make a slip knot and chain, to start each piece
- How to half double crochet, for every piece
- How to read a crochet pattern, for the sizes and repeats
- How to weave in ends, to finish neatly
A cozy, colorful hoodie makes a lovely handmade baby shower gift. 🦘
The Pattern
- Skill level
- Easy
- Yarn
- Bulky (#5) plush or chenille baby yarn
- Yarn amount
- About 330 (380, 450) yd / 302 (347, 411) m. These are estimates, so buy a little extra.
- Hook
- 6 mm (US J-10)
- Gauge
- 11 hdc and 9 rows = 4 in (10 cm)
- Finished size
- Sizes 6 (12, 24) months. Finished chest 22 (23½, 25) in / 56 (60, 63) cm. Length about 11 (12, 13¼) in / 28 (30, 34) cm.
- Time
- Varies with experience
Back
- Ch 32 (34, 36).
- Row 1: Hdc in the 3rd ch from the hook and in each ch across. Turn. (30 (32, 34) hdc)
- Row 2: Ch 2 (doesn't count as a st), 1 hdc in each st across. Turn. (30 (32, 34) hdc)
- Repeat Row 2 until you've worked 25 (27, 30) rows. Fasten off.
- Place a marker on each side edge, 4½ (5, 5½) in / 11.5 (12.5, 14) cm down from the top. The sleeves go above these markers.
Front
- Work as for the Back until you've worked 17 (18, 20) rows. Don't fasten off.
- The neck slit starts here. Each side of the front is worked on its own, over half the stitches.
- First side: Ch 2, 1 hdc in each of the first 15 (16, 17) sts. Turn, leaving the other sts unworked. Keep working rows of 15 (16, 17) hdc on these sts until the Front has 25 (27, 30) rows, the same as the Back. Fasten off.
- Second side: With the RS facing, join the yarn in the next unworked st at the slit. Ch 2, 1 hdc in the same st and in each st across. Turn. (15 (16, 17) hdc) Work rows of hdc until this side matches the first side. Fasten off.
Sleeves (make 2)
- Ch 27 (30, 32).
- Row 1: Hdc in the 3rd ch from the hook and in each ch across. Turn. (25 (28, 30) hdc)
- Row 2: Ch 2, 1 hdc in each st across. Turn.
- Repeat Row 2 until you've worked 14 (16, 19) rows. The sleeve measures about 6 (7, 8½) in / 15 (18, 21) cm. Fasten off.
Hood
- Ch 36 (38, 42).
- Row 1: Hdc in the 3rd ch from the hook and in each ch across. Turn. (34 (36, 40) hdc) This starting edge is the bottom of the hood, where it's sewn to the neck.
- Row 2: Ch 2, 1 hdc in each st across. Turn.
- Repeat Row 2 until you've worked 16 (17, 18) rows. Fasten off, leaving a long tail.
- Fold the hood in half so the last row is folded in two, with the right side inside. Sew the two halves of the last row together. This seam runs over the top of the head, and the folded corner at the back becomes the pixie point. Turn it right side out.
Kangaroo pocket
- Ch 18 (20, 22).
- Row 1: Hdc in the 3rd ch from the hook and in each ch across. Turn. (16 (18, 20) hdc)
- Row 2: Ch 2, 1 hdc in each st across. Turn.
- Rows 3–5: Ch 2, hdc2tog, 1 hdc in each st across to the last 2 sts, hdc2tog. Turn. (10 (12, 14) sts after Row 5)
- Row 6: Ch 2, 1 hdc in each st across. Turn.
- Repeat Row 6 until the pocket measures 3½ (3½, 4) in / 9 (9, 10) cm. Fasten off, leaving a long tail.
Putting it together
- Lay the Back flat and the Front on top, right sides together. Sew the shoulder seams over the outer 8 (9, 9) sts at each side. The stitches in the middle stay open for the neck.
- Center the bottom of the hood on the back of the neck. Sew it all around the neck opening, ending 1 (1, 1½) in / 2.5 (2.5, 4) cm down each side of the front slit. The hood edges will meet or overlap a little at the front, like a little V.
- Fold a sleeve in half lengthwise to find the middle of its top edge. Pin that point to the shoulder seam and sew the top of the sleeve to the body between the markers. Repeat for the other sleeve.
- Sew each side seam and sleeve seam in one go, from the hem up to the underarm and down to the cuff.
- Center the pocket on the Front, about 1½ in (4 cm) above the hem. Sew the bottom and top edges in place, leaving the slanted sides open for little hands.
Tassel
- Wrap the yarn around the cardboard 30 times. Slide a piece of yarn under the loops at the top and tie it tightly. Slip the loops off the card.
- Wrap another piece of yarn tightly around all the loops about ½ in (1.5 cm) below the top and knot it. Cut through the bottom loops and trim them even.
- Sew the tassel very firmly to the pixie point of the hood. Weave in all the ends.
Pattern notes
- Sizes are written as 6 (12, 24) months. If there's only one number, it's for all sizes.
- The ch 2 at the start of each row doesn't count as a stitch. Work the first hdc into the first stitch.
- Hdc2tog (half double crochet 2 together): yarn over, insert the hook in the next st and pull up a loop, yarn over, insert the hook in the next st and pull up a loop, yarn over and pull through all 5 loops.
- Every piece is a rectangle, except the pocket, which has slanted sides for the hand openings.
Keep this pattern handy
Print it now, or get the free PDF to save on your phone or tablet.
Free Pixie Baby Hoodie Crochet Pattern with a Kangaroo Pocket · Pattern by mycrochetmakes · mycrochetmakes.com/baby-hoodie-crochet-pattern/
Free for personal use. Please don't sell or redistribute this pattern.
Frequently asked questions
What yarn should I use?
A soft bulky (#5) plush or chenille baby yarn, like the ones sold for baby blankets. It's cuddly and hides the stitches. A smooth bulky yarn works too, it just won't look as fluffy.
Which size should I make?
Go by the finished chest measurement. The hoodie is roomy, with about 4 in (10 cm) of ease. If you're unsure, make the bigger size so it lasts longer.
How do I count stitches in plush yarn?
It can be tricky! Feel for the top of each stitch with your fingers, and use stitch markers at the start and end of each row so you don't lose the edge stitches.
Is the tassel safe for babies?
Make sure it's sewn on very firmly and check it often. For very young babies, you can leave the tassel off.
Can I make it longer?
Yes. Add rows to the Back and Front before the neck slit starts, the same number on each. Each 2 rows add about 1 in (2.5 cm).