Free Reindeer Christmas Ornament Crochet Pattern (Candy Cane Amigurumi)
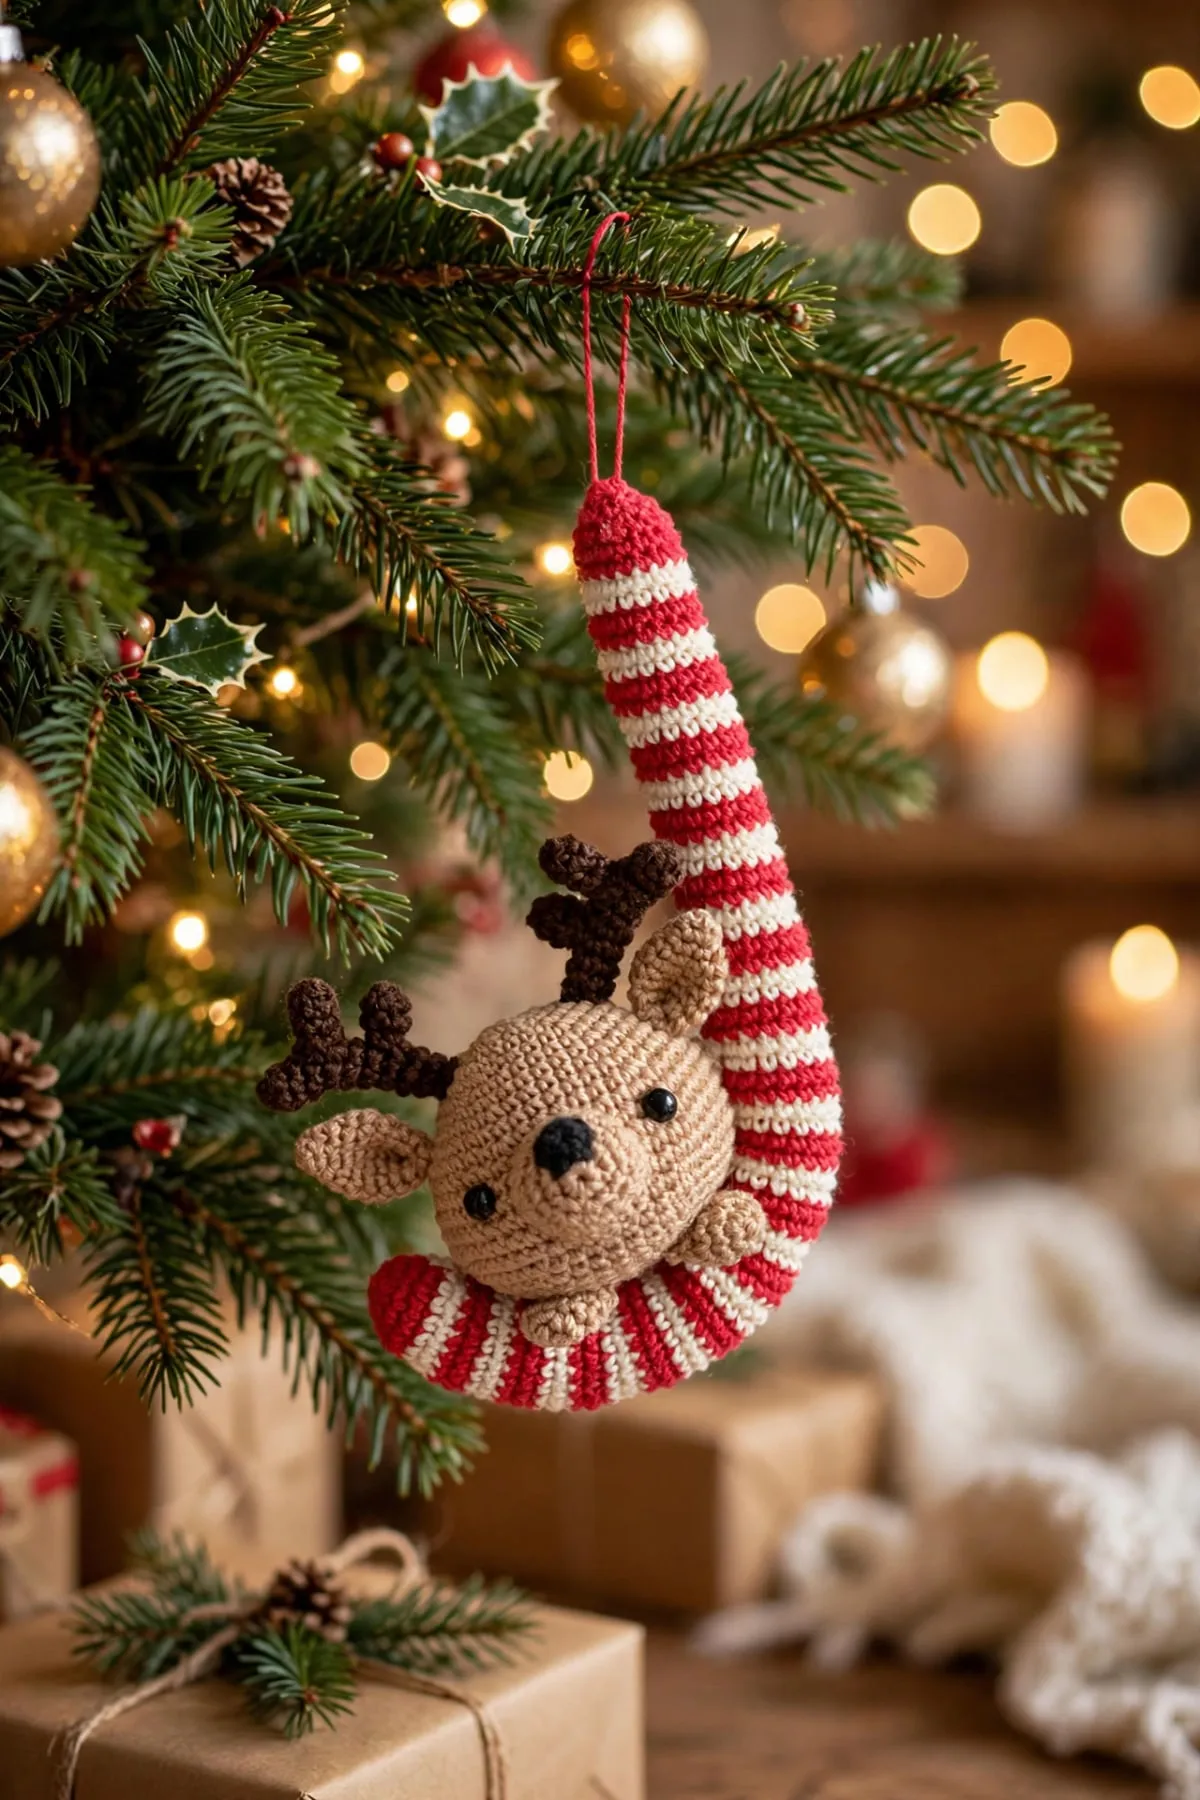
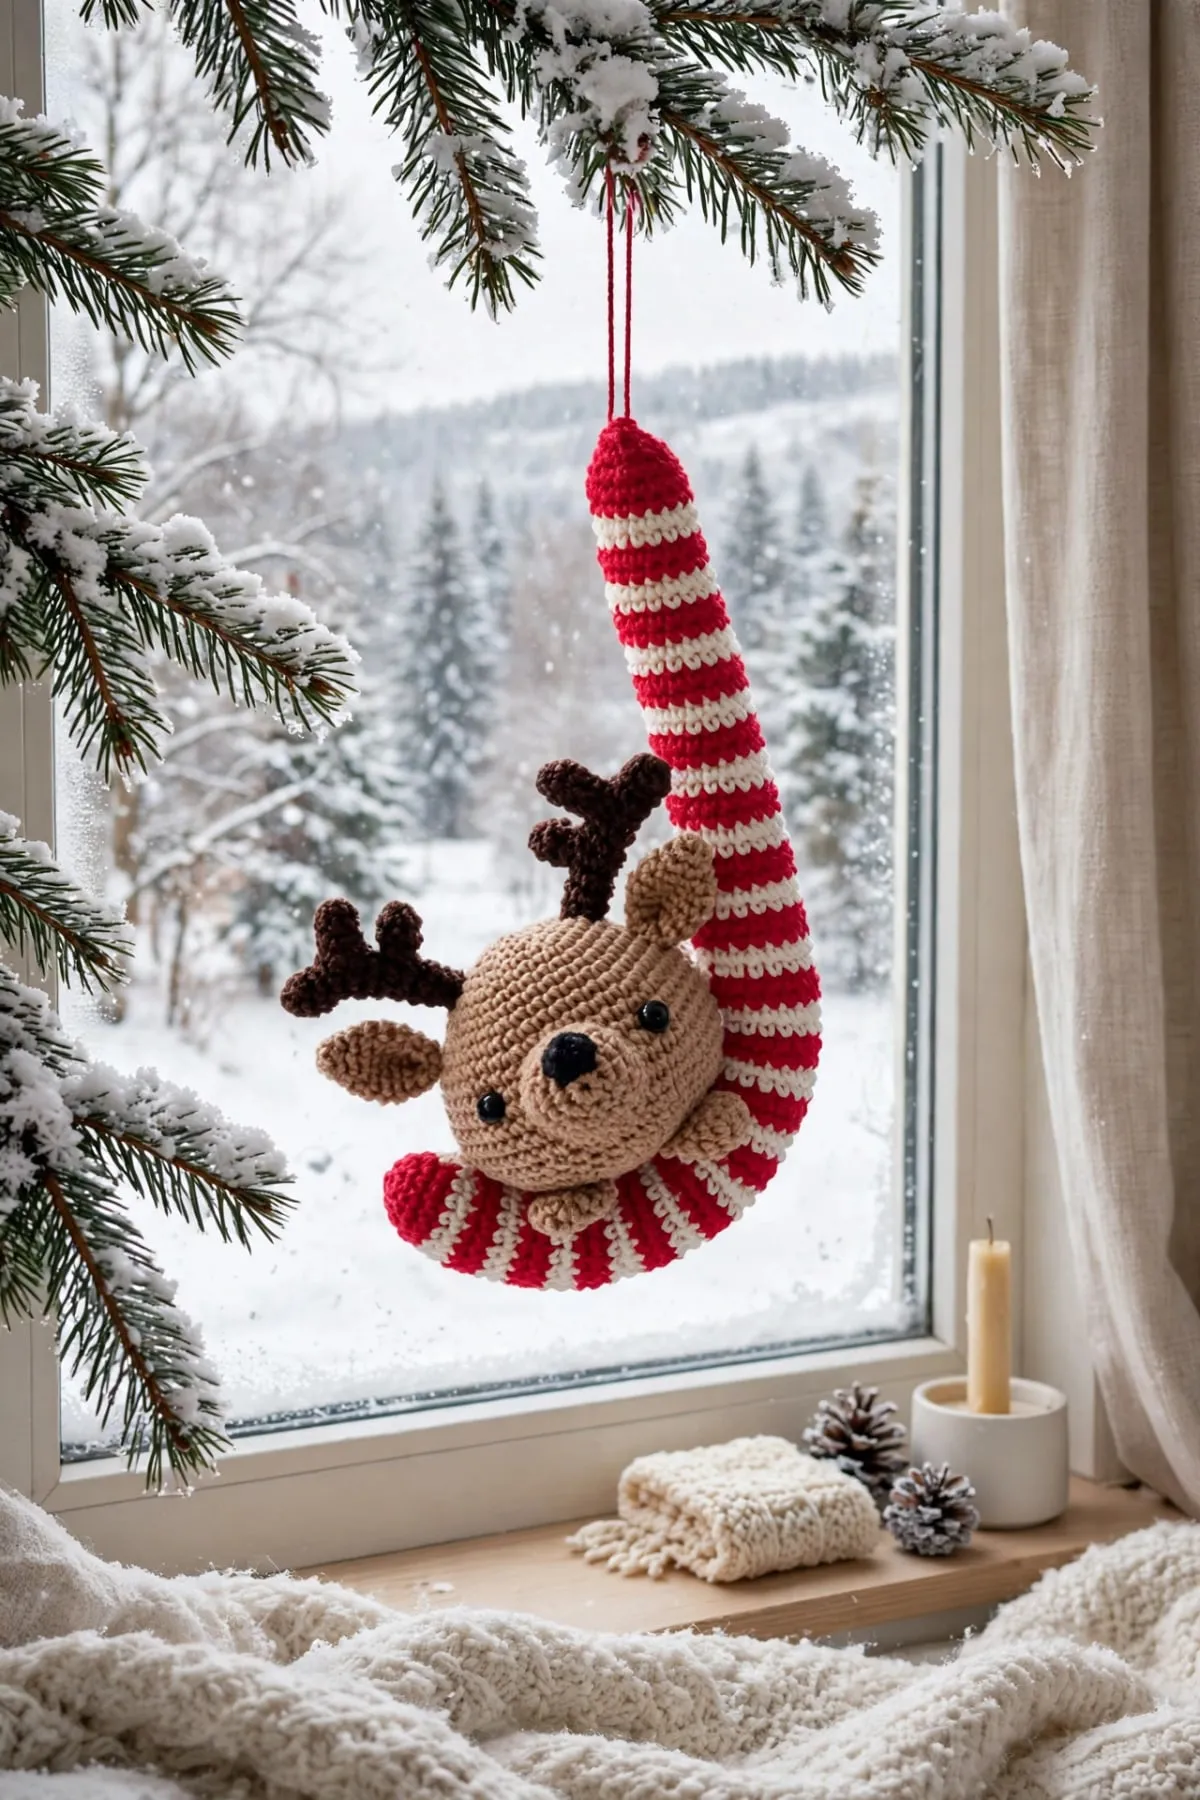
A little reindeer peeking out of a striped candy cane, ready to hang on the tree. It's all single crochet, worked in the round, and the spiral stripes on the cane happen almost by themselves.
 Save
Pattern Highlights
- It's all single crochet, so it's a friendly first Christmas amigurumi.
- The candy cane stripes spiral on their own. You just change color one stitch later every few rounds.
- Every round is written out with a stitch count, so you can check your work as you go.
- It makes a sweet handmade gift, tied onto a present or hung on the tree.
Materials
- Sport weight (#2) cotton in brown, dark brown, red, white and black (the sample uses Yarn and Colors Must-Have: brown 127, dark brown 028, red 032, white 001, black 100)
- 2.5 mm crochet hook
- 1 pair of 8 mm safety eyes
- Polyester fiberfill stuffing
- Stitch marker
- Yarn needle (a blunt tapestry needle)
- Pins and scissors
- Optional: a paper straw, to keep the straight part of the candy cane straight
Abbreviations used
This pattern uses US crochet terms. Tap any abbreviation for a full explanation, or see the complete crochet abbreviations list.
About this ornament
This little reindeer is one round piece for the head and body, with a snout, ears, antlers and tiny feet sewn on. It sits snug in the curl of a striped candy cane, and the whole thing hangs from a simple yarn loop.
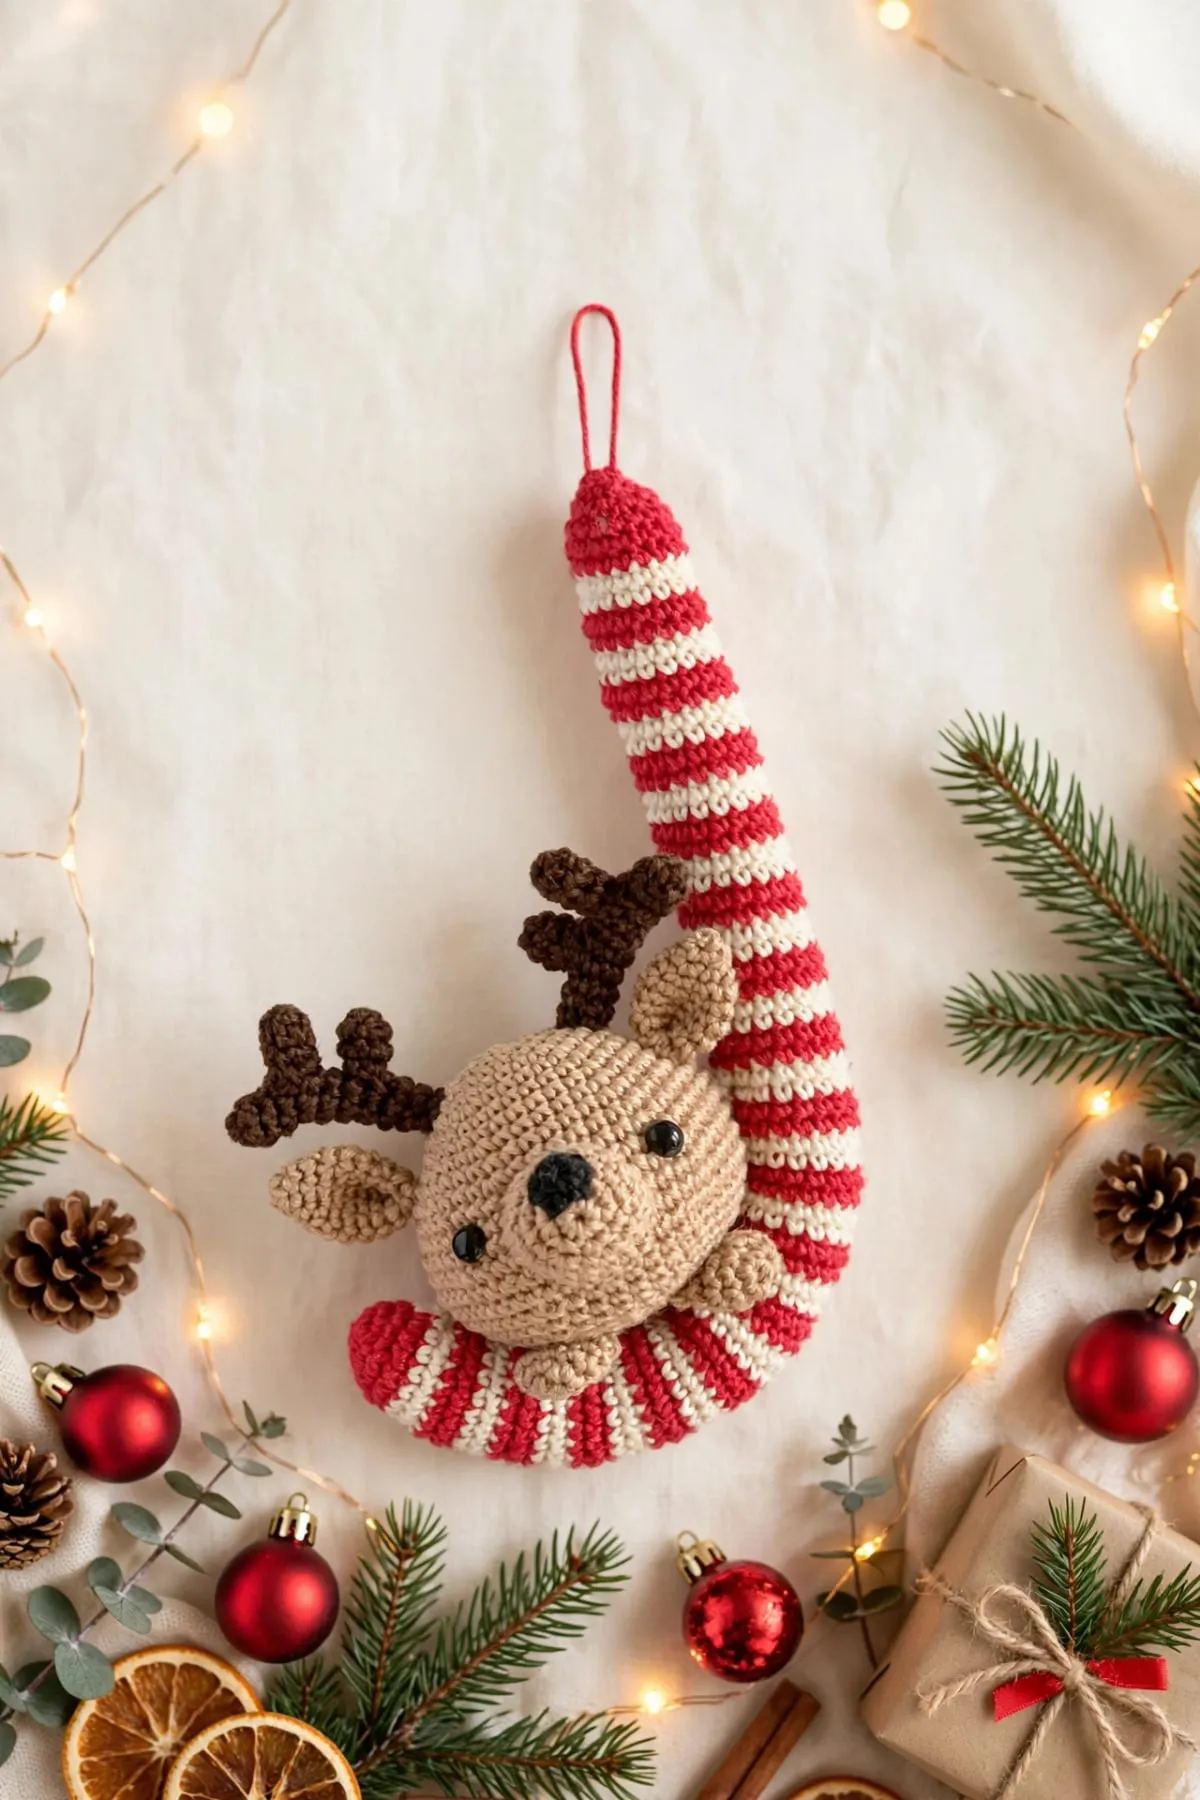
You’ll need five colors: brown for the reindeer, dark brown for the antlers, red and white for the candy cane, and a scrap of black for the nose.
Before you start
This one is rated easy. Every piece is single crochet worked in the round, but there are several small parts to sew on, and a fair few color changes on the candy cane.
- It’s worked in a spiral. Don’t join your rounds. Put a stitch marker in the first stitch of each round so you don’t lose your place.
- Every piece starts with a magic ring. If you’re new to it, my magic ring tutorial walks you through it step by step.
- Use the invisible decrease. Working your decreases through the front loops only keeps the head smooth and round.
- Place the eyes before you stuff. The eyes go in after round 17, while the opening is still wide enough to snap the backs on.
How the spiral stripes work
The candy cane is worked from the bottom up in two-round stripes. Every 4 rounds, you change color one stitch later than you did before. That tiny shift is what makes the stripes twist around the cane, like a real candy cane.
It looks like a long list of rounds, but it’s really the same two rounds over and over:
- A color-change round: work a few stitches, change color, finish the round.
- A plain round: single crochet all the way around.
Keep an eye on the number before the color change. It goes up by one every second stripe.
Shaping the candy cane
Once the cane is stuffed and closed, you’ll curl the top into a hook with a simple running stitch. Sew down one side for about 20 rounds, then pull gently. The more you pull, the tighter the curl.
The ornament hangs from the straight end, with the curl at the bottom. The reindeer sits in the curl like it’s in a little hammock.
Tips for success
- Stuff as you go. The candy cane is long and narrow. Adding a little stuffing every few rounds is much easier than stuffing it all at the end.
- Keep your stitches tight. With cotton yarn, tight stitches keep the stuffing hidden and the stripes crisp.
- Carry the unused color loosely. For the stripes, you can carry the color you’re not using up the inside of the cane instead of cutting it each time.
- Pin before you sew. Pin the snout, ears and antlers in place and look from a little distance before sewing anything.
- Sew the reindeer on firmly. Go through the back of the head and into the cane several times, so it doesn’t tip forward when it hangs.
Skills you’ll use
- How to crochet a magic ring, to start every piece
- How to single crochet, used for every round
- How to read a crochet pattern, if the brackets and stitch counts look confusing
- How to weave in ends, including hiding ends inside stuffed pieces
Make a few to hang on the tree, or tie one onto a wrapped gift as a little extra. 🎄

The Pattern
- Skill level
- Easy
- Yarn
- Sport weight (#2) cotton
- Yarn amount
- Brown 15–20 g, red 10–12 g, white 8–10 g, dark brown 5 g, and a small scrap of black. Amounts are estimates.
- Hook
- 2.5 mm (between US B-1 and C-2)
- Gauge
- Not critical. Work tightly so the stuffing doesn't show.
- Finished size
- Candy cane about 8 in (21 cm) long; reindeer about 2.75 in (7 cm) tall without the antlers
- Time
- Varies with experience
Head and body (brown)
- The head and body are one piece, worked in a continuous spiral. Rnd 1 is the top of the head.
- Rnd 1: 6 sc in MR. (6)
- Rnd 2: Inc 6 times. (12)
- Rnd 3: [Sc in next st, inc] 6 times. (18)
- Rnd 4: [Sc in next 2 sts, inc] 6 times. (24)
- Rnd 5: [Sc in next 3 sts, inc] 6 times. (30)
- Rnd 6: [Sc in next 4 sts, inc] 6 times. (36)
- Rnds 7–8: Sc in each st around. (36)
- Rnd 9: [Sc in next 5 sts, inc] 6 times. (42)
- Rnd 10: Sc in each st around. (42)
- Rnd 11: [Sc in next 6 sts, inc] 6 times. (48)
- Rnd 12: Sc in each st around. (48)
- Rnd 13: [Sc in next 7 sts, inc] 6 times. (54)
- Rnds 14–17: Sc in each st around. (54)
- Insert the 8 mm safety eyes between rnds 13 and 14, 11 stitches apart.
- Rnd 18: [Sc in next 7 sts, dec] 6 times. (48)
- Rnd 19: [Sc in next 6 sts, dec] 6 times. (42)
- Rnd 20: [Sc in next 5 sts, dec] 6 times. (36)
- Rnd 21: [Sc in next 4 sts, dec] 6 times. (30)
- Rnd 22: [Sc in next 3 sts, dec] 6 times. (24)
- Rnd 23: [Sc in next 2 sts, dec] 6 times. (18)
- Stuff the head and body firmly.
- Rnd 24: [Sc in next st, dec] 6 times. (12)
- Rnd 25: Dec 6 times. (6)
- Fasten off. Thread the tail through the front loops of the last 6 sts, pull tight to close the hole, then push the needle in under the closed hole and weave in the end.
Snout (brown)
- Rnd 1: 6 sc in MR. (6)
- Rnd 2: Inc 6 times. (12)
- Rnd 3: [Sc in next st, inc] 6 times. (18)
- Rnds 4–5: Sc in each st around. (18)
- Sl st in the next st and fasten off, leaving a long tail for sewing.
- Stuff lightly. Sew it onto rnds 12–17 of the head, centered between the eyes.
Nose (black)
- Rnd 1: 6 sc in MR. (6)
- Sl st in the next st and fasten off, leaving a long tail. Sew onto rnds 2–3 of the snout.
Ears (make 2, brown)
- Rnd 1: 4 sc in MR. (4)
- Rnd 2: [Sc in next st, inc] 2 times. (6)
- Rnd 3: [Sc in next 2 sts, inc] 2 times. (8)
- Rnd 4: [Sc in next 3 sts, inc] 2 times. (10)
- Rnd 5: [Sc in next 4 sts, inc] 2 times. (12)
- Rnds 6–9: Sc in each st around. (12)
- Sl st in the next st and fasten off, leaving a long tail. Don't stuff.
- Flatten the ear. Fold the bottom edge in half, bringing the two corners together, and pinch it with a stitch so the ear cups.
- Sew the ears to the sides of the head on rnds 10–11.
Antlers (make 2, dark brown)
- Each antler has three parts. They don't need stuffing, but a little in part 1 helps it stand up straight.
- Part 1 (main branch):
- Rnd 1: 6 sc in MR. (6)
- Rnds 2–10: Sc in each st around. (6)
- Sl st in the next st and fasten off, leaving a long tail.
- Part 2 (long branch):
- Rnd 1: 6 sc in MR. (6)
- Rnds 2–4: Sc in each st around. (6)
- Sl st in the next st and fasten off, leaving a long tail. Sew onto rnds 3–4 of part 1.
- Part 3 (short branch):
- Rnd 1: 6 sc in MR. (6)
- Rnds 2–3: Sc in each st around. (6)
- Sl st in the next st and fasten off, leaving a long tail. Sew onto rnd 6 of part 1.
- Sew the antlers to the top of the head, toward the sides, on rnds 5–6.
Feet (make 2, brown)
- Rnd 1: 6 sc in MR. (6)
- Rnd 2: Inc 6 times. (12)
- Rnds 3–4: Sc in each st around. (12)
- Rnd 5: [Sc in next st, dec] 4 times. (8)
- Sl st in the next st and fasten off, leaving a long tail. Stuff lightly and sew onto the bottom of the head and body.
Tail (brown)
- Rnd 1: 6 sc in MR. (6)
- Rnds 2–3: Sc in each st around. (6)
- Sl st in the next st and fasten off, leaving a long tail. Don't stuff. Sew onto the back on rnds 17–18.
Candy cane (red and white)
- Start with red.
- Rnd 1: 6 sc in MR. (6)
- Rnd 2: Inc 6 times. (12)
- Rnd 3: [Sc in next st, inc] 6 times. (18)
- Rnd 4: Sc in each st around. Change to white at the end of the round. (18)
- Rnds 5–6: With white, sc in each st around. Change to red at the end of rnd 6. (18)
- Rnds 7–8: With red, sc in each st around. (18)
- Start stuffing now, and keep stuffing as you go. If you're using a paper straw, slide it in now. It should only fill the straight part, stopping about 20 rounds below the top.
- Rnd 9: Sc in next st, change to white, sc in next 17 sts. (18)
- Rnd 10: Sc in each st around. (18)
- Rnd 11: Sc in next st, change to red, sc in next 17 sts. (18)
- Rnd 12: Sc in each st around. (18)
- Rnd 13: Sc in next 2 sts, change to white, sc in next 16 sts. (18)
- Rnd 14: Sc in each st around. (18)
- Rnd 15: Sc in next 2 sts, change to red, sc in next 16 sts. (18)
- Rnd 16: Sc in each st around. (18)
- Rnd 17: Sc in next 3 sts, change to white, sc in next 15 sts. (18)
- Rnd 18: Sc in each st around. (18)
- Rnd 19: Sc in next 3 sts, change to red, sc in next 15 sts. (18)
- Rnd 20: Sc in each st around. (18)
- Rnd 21: Sc in next 4 sts, change to white, sc in next 14 sts. (18)
- Rnd 22: Sc in each st around. (18)
- Rnd 23: Sc in next 4 sts, change to red, sc in next 14 sts. (18)
- Rnd 24: Sc in each st around. (18)
- Rnd 25: Sc in next 5 sts, change to white, sc in next 13 sts. (18)
- Rnd 26: Sc in each st around. (18)
- Rnd 27: Sc in next 5 sts, change to red, sc in next 13 sts. (18)
- Rnd 28: Sc in each st around. (18)
- Rnd 29: Sc in next 6 sts, change to white, sc in next 12 sts. (18)
- Rnd 30: Sc in each st around. (18)
- Rnd 31: Sc in next 6 sts, change to red, sc in next 12 sts. (18)
- Rnd 32: Sc in each st around. (18)
- Rnd 33: Sc in next 7 sts, change to white, sc in next 11 sts. (18)
- Rnd 34: Sc in each st around. (18)
- Rnd 35: Sc in next 7 sts, change to red, sc in next 11 sts. (18)
- Rnd 36: Sc in each st around. (18)
- Rnd 37: Sc in next 8 sts, change to white, sc in next 10 sts. (18)
- Rnd 38: Sc in each st around. (18)
- Rnd 39: Sc in next 8 sts, change to red, sc in next 10 sts. (18)
- Rnd 40: Sc in each st around. (18)
- Rnd 41: Sc in next 9 sts, change to white, sc in next 9 sts. (18)
- Rnd 42: Sc in each st around. (18)
- Rnd 43: Sc in next 9 sts, change to red, sc in next 9 sts. (18)
- Rnd 44: Sc in each st around. (18)
- Rnd 45: Sc in next 10 sts, change to white, sc in next 8 sts. (18)
- Rnd 46: Sc in each st around. (18)
- Rnd 47: Sc in next 10 sts, change to red, sc in next 8 sts. (18)
- Rnd 48: Sc in each st around. (18)
- Rnd 49: Sc in next 11 sts, change to white, sc in next 7 sts. (18)
- Rnd 50: Sc in each st around. (18)
- Rnd 51: Sc in next 11 sts, change to red, sc in next 7 sts. (18)
- Rnd 52: Sc in each st around. (18)
- Rnd 53: Sc in next 12 sts, change to white, sc in next 6 sts. (18)
- Rnd 54: Sc in each st around. (18)
- Rnd 55: Sc in next 12 sts, change to red, sc in next 6 sts. (18)
- Rnd 56: Sc in each st around. (18)
- Rnd 57: Sc in next 13 sts, change to white, sc in next 5 sts. (18)
- Rnd 58: Sc in each st around. (18)
- Rnd 59: Sc in next 13 sts, change to red, sc in next 5 sts. (18)
- Rnd 60: Sc in each st around. (18)
- Rnd 61: Sc in next 14 sts, change to white, sc in next 4 sts. (18)
- Rnd 62: Sc in each st around. (18)
- Rnd 63: Sc in next 14 sts, change to red, sc in next 4 sts. (18)
- Rnd 64: Sc in each st around. (18)
- Rnd 65: Sc in next 15 sts, change to white, sc in next 3 sts. (18)
- Rnd 66: Sc in each st around. (18)
- Rnd 67: Sc in next 15 sts, change to red, sc in next 3 sts. (18)
- Rnd 68: Sc in each st around. (18)
- Rnd 69: Sc in next 16 sts, change to white, sc in next 2 sts. (18)
- Rnd 70: Sc in each st around. (18)
- Rnd 71: Sc in next 16 sts, change to red, sc in next 2 sts. (18)
- Rnds 72–73: Sc in each st around. (18)
- Finish stuffing.
- Rnd 74: [Sc in next st, dec] 6 times. (12)
- Rnd 75: Dec 6 times. (6)
- Fasten off. Thread the tail through the front loops of the last 6 sts, pull tight to close, and weave in the end.
Shaping the candy cane
- Thread a long piece of red yarn onto your yarn needle.
- Starting at the end you finished last (rnd 75), sew a running stitch down one side of the cane for about 20 rounds.
- Pull the yarn gently until that end curls into a hook. Knot it and weave in the end.
- For the hanging loop, tie a 6 in (15 cm) piece of red yarn to the straight end (rnd 1) and knot it into a loop. The ornament hangs from the straight end, with the curl at the bottom.
Assembly
- Pin all the pieces onto the head and body before sewing, and check the look from all sides.
- Sew on the snout, then the nose, ears, antlers, feet and tail.
- Hold the cane by its hanging loop so the curl is at the bottom. Nestle the reindeer into the curl with its face turned outward and the antlers against the straight part.
- Sew the reindeer on securely through the back of the head and body, into the curl and the straight part of the cane.
- Weave in all remaining ends.
Pattern notes
- Work every piece in a continuous spiral. Don't join the rounds. Move your stitch marker up to the first stitch of each new round.
- For "dec," an invisible decrease through the front loops gives the neatest finish.
- To change color, work the last stitch of the old color until 2 loops are left on your hook, then pull the new color through those 2 loops.
- Safety eyes and small parts aren't suitable for children under 3. For a baby-safe version, embroider the eyes with black yarn.
Keep this pattern handy
Print it now, or get the free PDF to save on your phone or tablet.
Free Reindeer Christmas Ornament Crochet Pattern (Candy Cane Amigurumi) · Pattern by mycrochetmakes · mycrochetmakes.com/reindeer-christmas-ornament-crochet-pattern/
Free for personal use. Please don't sell or redistribute this pattern.
Frequently asked questions
Can I use acrylic yarn instead of cotton?
Yes. Cotton gives crisp stitches and neat stripes, but a sport weight acrylic works too. Keep your stitches tight so the stuffing doesn't show.
Do I have to use the paper straw?
No, it's optional. It just helps the straight part of the candy cane stay straight. Firm, even stuffing works well too.
Why do the candy cane stripes spiral?
Every 4 rounds, you change color one stitch later than before. That small shift makes the stripes twist around the cane.
Is this ornament safe for babies?
No. Safety eyes and small sewn-on parts aren't safe for children under 3. For a baby-safe version, embroider the eyes with black yarn, and keep the ornament out of reach of little ones.
How big is the finished ornament?
In sport weight cotton with a 2.5 mm hook, the candy cane is about 8 in (21 cm) long, and the reindeer is about 2.75 in (7 cm) tall, not counting the antlers.